How to Use a Window Cleaning Robot (Step-by-Step Guide)
April 7, 2026
Learn how to use a Window Cleaning Robot step by step. Discover how to clean windows safely and efficiently. Window Cleaning Robot rental available in Tallinn 24/7 with Toolscab.
How to Use a Window Cleaning Robot
A Window Cleaning Robot is a convenient helper when you want to clean your windows faster, more safely, and with less effort. It is especially practical for larger glass surfaces, hard-to-reach windows, and exterior windows in higher places. If you do not need such a device on a daily basis, Window Cleaning Robot rental is a practical solution because you can use it exactly when you actually need it.
Toolscab’s Window Cleaning Robot helps reduce the effort of washing windows by hand and is well suited for cleaning windows, office glass, balcony doors, and other smooth glass surfaces. In this article, we will go through step by step how to use a Window Cleaning Robot so that the result is clean and as streak-free as possible.
This is also where the convenience of Window Cleaning Robot rental becomes clear: you can complete your seasonal window cleaning all at once without having to buy a separate device for yourself.
What Is a Window Cleaning Robot and How Does It Work?
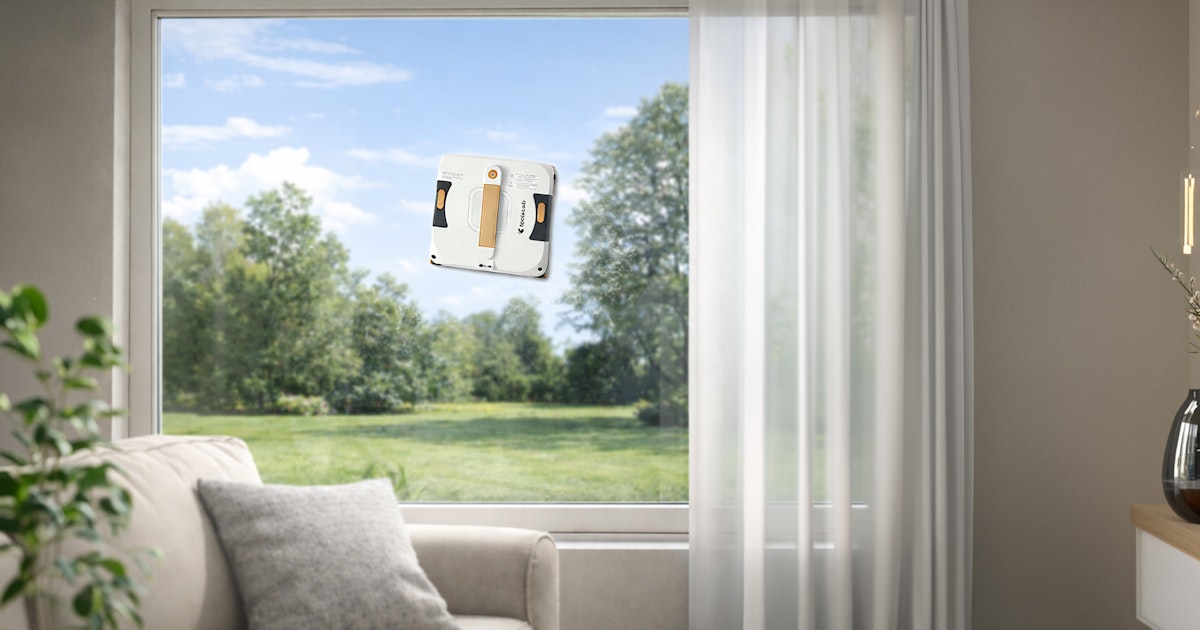
A Window Cleaning Robot is a device that attaches to a glass surface using suction and moves across the window automatically. During cleaning, it removes dust, light dirt, and the usual layer of grime from the glass. In most cases, the user only needs to place the device correctly on the window, attach the safety rope, select a cleaning mode, and remove the robot once the job is finished.
That is exactly why Window Cleaning Robot rental is a sensible option for many people: you do not have to invest in a device that you are likely to use only a few times a year, but you can still get your windows cleaned conveniently.
When Is It Worth Using a Window Cleaning Robot?
A Window Cleaning Robot is a good choice when:
- you want to clean large glass surfaces faster,
- your windows are difficult to reach,
- you do not want to use a ladder or stretch into awkward positions,
- you want to do regular maintenance cleaning with less effort,
- you need help cleaning mirrors, glass doors, or other smooth glass surfaces.
If your goal is to do seasonal window cleaning without buying an expensive device, Window Cleaning Robot rental is especially practical.
What Should You Check Before Use?
Before you start, it is worth making a few simple checks. This helps the Window Cleaning Robot work more smoothly and improves the final result.
- Make sure the glass surface is suitable for the device and smooth enough.
- Check that the device is connected to a power source.
- Attach the safety rope to a secure point.
- Inspect the cleaning pads and make sure they are clean.
- If the window is very muddy or sandy, remove the heavier dirt by hand first.
If the window has a lot of dried mud, insect marks, or other heavy dirt, it is not a good idea to let the robot start directly on a very dirty surface. In that case, it is better to do a light pre-clean first so the pads do not become too dirty immediately.
Step 1: Prepare the Window
You will get the best result if you remove larger dust particles and loose dirt before using the robot. You can do this with a dry microfiber cloth or, if needed, a very slightly damp cloth. The goal is not to wash the window by hand first, but to remove the dirt that could interfere with the robot or make the cleaning pads dirty too quickly.
If the glass is very dirty, the Window Cleaning Robot may effectively do a pre-cleaning pass on the first run. In that case, the best result usually comes from changing the cleaning pads after the first pass and letting the robot clean the surface again.
Step 2: Attach the Safety Rope and Connect the Device to Power
Before placing the robot on the window, always attach the safety rope. This is important for safety, especially when cleaning higher windows or the outside of a window. The safety rope should be attached to a stable point so that, in addition to suction, the device is also mechanically secured.
Next, connect the Window Cleaning Robot to power. Continuous power is typical for devices like this because it helps maintain stable operation and suction throughout the cleaning process.
Step 3: Place the Window Cleaning Robot on the Glass
Place the device against the glass according to its operating logic: hold it firmly in place, switch it on, and let the suction pull the robot onto the window. Once you feel that the device is securely attached to the glass, you can let go.
It is important not to rush. Always make sure the robot is firmly attached before releasing it. If you are using the device for the first time, do your first test on a simple and easily accessible window.
Step 4: Choose the Cleaning Mode
Window Cleaning Robots usually have automatic cleaning patterns that help cover the full surface systematically. In some cases, the device can also be controlled with a remote or an app. For everyday window cleaning, the automatic mode is usually the most convenient option.
If you notice a more problematic spot, such as a dried stain or a dirtier corner, you can let the robot go over that area again. If needed, do a second cleaning pass with cleaner pads.
Step 5: Monitor the Cleaning Process
Even though the Window Cleaning Robot works automatically, it is still worth keeping an eye on it. This allows you to notice immediately if a pad has become too dirty, the glass is too wet, or a certain area needs extra attention. Especially during the first few uses, monitoring helps you better understand how the device moves on your windows and what kind of result it leaves.
If you are cleaning several windows in a row, check the cleaning pads regularly. Dirty pads can start spreading dirt around and leave streaks on the glass.
Step 6: Change the Pads if Needed and Do a Second Pass
A perfectly streak-free result may not always come from one pass if the window is very dirty. That is normal. Very often, the best result comes from a two-step approach:
- the first pass removes the heavier dirt,
- the second pass with clean pads finishes the result.
If you want especially clean windows, it is worth keeping this in mind from the beginning. This helps avoid the unrealistic expectation that a window that has not been cleaned for a year will become perfectly spotless after only one pass.
Step 7: Remove the Robot and Finish by Hand if Needed
Once the cleaning program is finished, remove the device from the window carefully. After that, if necessary, you can quickly wipe the window edges or corners with a dry microfiber cloth. In some cases, the edges and corners may need a little manual finishing for the result to look especially neat.
After the windows are cleaned, also clean the robot’s pads and make sure the device is in good condition for the next user. If you use Toolscab’s service, returning the device properly is an important part of the rental experience.
Common Mistakes When Using a Window Cleaning Robot
- Placing the robot on a very dirty window without any pre-cleaning.
- Not changing the cleaning pads often enough.
- Leaving the safety rope unattached.
- Expecting one cleaning pass to remove all heavy dirt.
- Not finishing the edges and corners by hand when needed.
If you avoid these mistakes, the result will usually be much better and using a Window Cleaning Robot will be easier and smoother.
Keep in Mind
- If you use cleaning liquid, the robot must be emptied after use.
- The cleaning pads should be slightly damp rather than too wet.
- If the tracks are moving but the machine is not moving properly, the tracks need to be cleaned: turn the machine upside down, press the appropriate button on the remote, and clean the tracks with a damp or detergent cloth.
- Frameless glass panels must not be pushed together during cleaning or allow the robot to move over the joint between them — they should be cleaned separately.
Is Window Cleaning Robot Rental Worth It?
For most people, yes. A Window Cleaning Robot is not a device that is used every week. Usually, it is needed seasonally or when it is time to clean all the windows at once. That is why Window Cleaning Robot rental is a good option: you get to use a convenient device without having to buy it and store it at home.
With Toolscab, one of the advantages is that devices can be rented from self-service rental cabinets 24/7. This makes Window Cleaning Robot rental especially convenient when you want to clean your windows on the day and at the time that suits you best.
Conclusion
Using a Window Cleaning Robot is simple if you follow the right order: prepare the window, attach the safety rope, connect the device to power, place the robot on the glass, choose the cleaning mode, and monitor the result. If needed, do a second cleaning pass and finish the edges by hand.
If you do not need such a device regularly, Window Cleaning Robot rental is a practical and cost-effective solution. This way, you can get your windows clean with less effort and only pay when you actually use the device.
Frequently Asked Questions
Does a Window Cleaning Robot work on all windows?
It is mainly suitable for smooth glass surfaces. Before use, it is always a good idea to make sure that your specific window is suitable for this type of device.
Does a Window Cleaning Robot leave streaks?
If the pads are clean and the window is not excessively dirty, the result will be very good. If the window is very dirty, a second cleaning pass with clean pads often helps.
Do I need to use the safety rope?
Yes, using the safety rope is important for safety, especially when cleaning higher windows or exterior glass surfaces.
Is Window Cleaning Robot rental better than buying one?
If you only use this type of device occasionally, Window Cleaning Robot rental is usually more practical than buying one.

More devices that might interest you
- Carpet and upholstery cleanerCarpet and upholstery cleaner rental in Tallinn 0,10 € minute, 24,00 € day
- Steam Cleaner Kärcher SC4 EasyfixSteam cleaner rental in Tallinn 0,09 € minute, 21,60 € day
- Window Cleaning Robot Mamibot W120-PWindow cleaning robot rental Mamibot W120-P in Tallinn 0,07 € minute, 16,80 € day
- Steam Cleaner Kärcher SC2Steam cleaner rental Kärcher SC2 in Tallinna in Tallinn 0,08 € minute, 19,20 € day
- Window Cleaning Robot Mamibot W120-TWindow cleaning robot rental Mamibot W120-T in Tallinn 0,07 € minute, 16,80 € day
- Nilfisk Water and Vacuum CleanerWater and vacuum cleaner rental in Tallinn 0,09 € minute, 21,60 € day
- Window Cleaning Robot Schbot Wind X3Window cleaning robot rental Schbot Wind X3 in Tallinn 0,12 € minute, 28,80 € day